How to Make Food Last Longer Without a FridgeCooking Techniques

How to Make Food Last Longer Without a Fridge: Easy Method

In today’s fast world, keeping food fresh is key. Luckily, you can use old and new ways to keep food good without a fridge. This guide will show you how to keep your food fresh, using natural methods and smart storage.

Want to cut down on food waste or live more sustainably? Or maybe you just want a full pantry? This article has got you covered. You’ll learn about ancient ways to preserve food and how to dry it. You’ll get lots of tips to keep your food fresh and tasty for longer.

Understanding Traditional Food Preservation Methods

For centuries, people have found ways to keep food fresh without refrigeration. Our ancestors used clever methods to make food last longer. These old ways of preserving food are still useful today.

Ancient Preservation Techniques Still Used Today

Techniques like drying, salting, and smoking are still used today. They use nature to stop bad bacteria and mold from growing. For example, drying takes away moisture, making it hard for bacteria to live.

Benefits of Non-Refrigerated Food Storage

Storing food without refrigeration is good for the planet and saves money. It also keeps food tasting better and more nutritious. This makes meals more enjoyable.

Basic Principles of Food Preservation

  • Controlling moisture content: Reducing the water available to microorganisms is a fundamental principle of food preservation.
  • Manipulating pH levels: Maintaining an acidic or alkaline environment can inhibit the growth of certain bacteria and fungi.
  • Limiting oxygen exposure: Minimizing the presence of oxygen can prevent the proliferation of aerobic microbes.
  • Employing antimicrobial agents: Natural compounds like salt, sugar, and certain herbs and spices can act as effective preservatives.

Knowing these principles helps people use old and new ways to keep food fresh. This way, they don’t have to rely only on refrigerators.

Preservation TechniqueDescriptionKey Benefits
DryingRemoving moisture from foods to inhibit microbial growthLightweight, compact storage; extended shelf life
SaltingUsing salt to draw out moisture and create an unfavorable environment for microbesPreserves flavor and texture; no refrigeration required
SmokingExposing foods to the smoke of burning wood or herbs, which acts as a natural preservativeImparts unique flavors; inhibits bacterial and fungal growth
Understanding Traditional Food Preservation Methods

Setting Up Your Root Cellar for Optimal Storage

A well-designed root cellar is key for long-term food storage without a fridge. It’s a traditional method that keeps your food fresh for longer. Let’s look at how to make your root cellar work best for saving food.

The right temperature and humidity are crucial. Aim for a cool, steady temperature of 35-45°F (2-7°C). Also, keep humidity at 80-95%. This helps slow down mold and keeps your food fresh.

To get these conditions right, follow these tips:

  1. Choose a location: Pick a spot that’s partly underground or well-insulated, like a basement or shed. This keeps it cool and humid.
  2. Insulate the walls and ceiling: Good insulation helps keep the temperature steady. It stops sudden changes that can harm your food.
  3. Install a ventilation system: Good air flow is key. It keeps humidity right and stops mold and bad smells.
  4. Use shelving and containers: Get strong, moisture-proof shelves and containers. They help organize your food and use space well.

With a well-designed root cellar, you can keep your food fresh longer. This cuts down on waste and gives you fresh, healthy ingredients all year.

How to Make Food Last Longer Without a Fridge: Essential Tips

Keeping food fresh without a fridge might seem hard, but it’s doable with the right methods. The main steps are controlling temperature, managing humidity, and ensuring good air flow.

Temperature Control Basics

Keeping the right temperature is key for food to stay fresh. Try to keep your storage area between 40°F and 70°F. Big changes in temperature can cause bad bacteria to grow faster and make food spoil quicker.

Use insulation, shade, or cooling methods to keep your storage area at the right temperature.

Humidity Management

The best humidity for storing food is between 50% to 70%. Too much moisture can cause mold, while too little can dry out food. Use fans, dehumidifiers, or desiccants to keep the humidity just right for each food type.

Air Circulation Requirements

Good air flow is vital to stop moist, still air that can help germs grow. Make sure your storage area has enough air by using fans, vents, or natural air flow. Always check and clean your air flow tools to keep them working well.

By focusing on temperature control, humidity management, and air circulation, you can keep your food fresh without a fridge. A bit of planning and care can help your food last longer and cut down on waste.

How to Make Food Last Longer Without a Fridge Essential Tips

Mastering the Art of Food Dehydration

Food dehydration is a way to keep food fresh for a long time. It removes moisture, stopping bacteria and mold from growing. This lets you enjoy your food’s taste and nutrients even after it’s been picked or cooked.

Want to keep your garden’s harvest fresh or make healthy snacks? Learning how to dehydrate food is a great skill. We’ll cover the basics of food dehydration, from picking the right tools to storing your dried food.

Dehydration Methods and Equipment

There are a few main ways to dehydrate food:

  • Solar drying: Uses the sun’s heat to dry food slowly.
  • Electric dehydrators: Appliances that blow warm air to dry food faster.
  • Oven drying: Uses a low oven temperature to dry food.

When choosing equipment, think about its size, energy use, and how well it controls temperature. This ensures you get the best results for your needs.

Preparing and Storing Dehydrated Foods

Getting your food ready for dehydration is crucial. Make sure it’s clean, cut evenly, and laid flat on trays or sheets. Watch the drying closely, adjusting settings as needed, until it’s dry enough.

After drying, put your food in airtight containers like glass jars or plastic bags. This keeps moisture and air out. Label each container with what’s inside and when you dried it. Good storage helps your dried food stay fresh for months or years.

FoodDehydration TimeShelf Life (Properly Stored)
Apples6-12 hours1-2 years
Tomatoes8-16 hours1-2 years
Jerky4-8 hours2-3 months
Herbs2-4 hours1-2 years

Learning food dehydration opens up a world of preservation techniques. It not only extends the shelf life of your favorite foods but also brings new, healthy, and tasty snacks and ingredients.

Natural Fermentation Techniques for Food Preservation

Fermentation is a natural way to keep food fresh for longer. It keeps the nutrients in your food and adds a new flavor. Let’s explore how to use fermentation in your kitchen.

Basic Fermentation Process

Fermentation uses helpful microbes like bacteria and yeast. They break down sugars and starches, making lactic acid or alcohol. This not only keeps food fresh but also makes it taste tangy or bubbly.

Best Foods for Fermentation

  • Vegetables: Cabbage, carrots, cucumbers, and peppers are all excellent candidates for fermentation, transforming into sauerkraut, kimchi, and pickles.
  • Fruits: Apples, berries, and citrus fruits can be fermented into flavorful vinegars and beverages.
  • Dairy: Yogurt, kefir, and cheese are all products of fermentation, showcasing the versatility of this preservation method.
  • Grains: Breads, cereals, and even beer can be produced through the magic of fermentation.

Storage Requirements

Keeping fermented foods in the right place is key. They need a cool, dark spot with little air. Use special jars or crocks to keep air out. Keep the temperature between 55°F and 75°F to keep your food fresh.

FoodFermentation TimeStorage Temperature
Sauerkraut4-6 weeks55-65°F
Kimchi2-4 weeks55-65°F
Kombucha7-14 days65-85°F
Yogurt8-12 hours100-110°F

Learning about fermentation opens up new flavors and keeps food fresh longer. Start using these microbes to preserve your food in a tasty way.

Natural Fermentation Techniques for Food Preservation

Canning and Preserving Fresh Produce

Canning and preserving fresh produce can really help your pantry storage. This old method keeps fruits and veggies fresh longer. It also keeps their nutrients and flavors.

Canning seals produce in airtight jars or cans. This stops air and germs from getting in. Your canned items stay good and tasty for a long time, even without fridge. Preserving produce through drying or fermentation is another great way to store food.

Mastering the Art of Canning

Good canning needs careful attention and following safety rules. Start with the freshest produce and clean jars and lids well. Learn about different canning methods and how long and hot they need to be.

  • Water-bath canning works for foods like tomatoes, fruits, and pickled veggies.
  • Pressure canning is key for foods like meats, soups, and veggies to kill bacteria.

Right canning keeps your produce’s taste and texture. It also keeps it safe from bad bacteria.

Exploring Other Preservation Techniques

There are other ways to preserve produce too. Dehydration takes out moisture, making foods last longer. Fermentation uses good bacteria to change food into probiotic-rich foods that last months.

Choosing the right preservation method is key for good pantry storage. Learning these skills lets you fill your pantry with tasty, healthy foods.

Creating a Proper Pantry Storage System

Keeping your pantry organized is key to keeping food fresh. By using smart storage methods, the right containers, and clear labels, you can make your pantry run smoothly. This keeps your food in top shape.

Organization Methods

Start by sorting your pantry items into groups like grains, canned goods, and spices. Use shelves or stackable containers to make the most of your space. Label each area well so you can find things easily.

Think about using lazy susans or pull-out drawers. They help keep items visible and within reach.

Container Selection

Picking the right containers is vital for pantry storage and food organization. Airtight containers are best for dry goods like flour and sugar. They help keep food fresh longer. Glass jars or BPA-free plastic are good choices.

For different shapes and sizes, get modular storage. It can be adjusted to fit your needs.

Labeling and Rotation Systems

Use labels to show what’s inside, when it was stored, and when it expires. This makes it easy to use older items first and avoid waste. Rotate your pantry items to keep things fresh.

Use a whiteboard or chalkboard to track what you have. It helps plan meals and use up food before it goes bad.

Pantry Organization TipsBenefits
Categorize items into logical groupsImproved visibility and accessibility
Utilize vertical space with shelves or stackable containersMaximized storage capacity
Use airtight, moisture-proof containers for dry goodsExtended shelf life
Implement a clear labeling and rotation systemReduced food waste

By following these tips, you can make your pantry efficient and organized. This keeps food fresh and makes it easier to find what you need.

Using Natural Preservatives and Antimicrobial Herbs

Looking to keep your food fresh longer without the fridge? Natural preservatives and antimicrobial herbs are key. They help keep your food fresh and safe to eat.

Herbs like rosemarythyme, and oregano are great at stopping bad bacteria and mold. Adding these herbs to your food can make it last longer. This is true for meats and even baked goods.

Ingredients like saltvinegar, and honey also fight off spoilage. They make it hard for bad microbes to grow. This slows down food from going bad, making it last longer.

Antimicrobial HerbPreservation Properties
RosemaryInhibits the growth of mold and bacteria, useful for preserving meats and baked goods.
ThymePossesses strong antimicrobial and antioxidant properties, beneficial for extending the shelf life of various foods.
OreganoEffective against a wide range of microbes, making it a versatile preservative for various food items.

Using natural preservatives and herbs can make your food last longer. It’s a step towards a more sustainable lifestyle. Try out different mixes and see how these old methods work for you.

Best Practices for Storing Different Food Types

Keeping food fresh and extending its shelf life needs specific storage methods. Whether it’s delicate produce, grains, or cured meats, knowing the best storage practices is key. It greatly improves your food storage success.

Fruits and Vegetables

Proper storage is crucial for fruits and vegetables to avoid early spoilage. Leafy greens do well in cool, humid places like root cellars or insulated coolers. On the other hand, potatoes and onions prefer dry, dark spots.

Citrus fruits need cool temperatures and moderate humidity. This helps keep them juicy and prevents mold.

Grains and Legumes

Grains and legumes, like wheat, rice, and dried beans, need a dry, well-ventilated spot. Airtight containers or sealed mylar bags help keep them fresh and nutritious for longer. It’s important to regularly check and rotate your stored food to keep it in the best condition.

Preserved Meats

Cured and smoked meats, like jerky, salami, and ham, need a cool, low-humidity place. A root cellar or a meat-aging cabinet is perfect. They should be kept at 50°F to 60°F with 60% to 70% humidity.

Wrapping them properly and checking them often is vital. It helps prevent spoilage and keeps your meats fresh for a long time.

Best Practices for Storing Different Food Types

Conclusion

By mastering these age-old techniques, you can extend the life of your food, reduce waste, and save money. With a bit of knowledge and planning, you can create a sustainable and flavorful food storage system that works for you. Embrace the art of food preservation and enjoy the satisfaction of knowing your food is well-cared for.

Also Read:

FAQs

What are some common mistakes people make when storing food without a fridge?

Common mistakes include improper temperature and humidity control, inadequate cleaning, and poor storage practices like not using airtight containers or rotating food regularly.

How can I extend the shelf life of fresh produce without refrigeration?

Store leafy greens in cool, humid places. Separate fruits to prevent ethylene gas from accelerating ripening. Use paper towels to absorb excess moisture and consider using natural preservatives like vinegar or lemon juice.

What are some natural preservatives that can be used to extend food life?

Salt, sugar, vinegar, and certain herbs and spices are effective natural preservatives. They create an environment that is unfavorable for bacteria and mold growth.

How can I dehydrate food effectively at home?

To dehydrate food effectively, ensure it’s properly cleaned and sliced evenly. Follow the recommended drying times and temperatures for different foods. Store the dried food in airtight containers in a cool, dark place.

What are some tips for successful fermentation?

Keep the fermentation environment clean and sanitized. Use high-quality ingredients and follow specific temperature and time guidelines. Store fermented foods in airtight containers in a cool, dark place.

READ MORE
How-to-Make-Chicken-Tikka-MasalaRecipes

How to Make Chicken Tikka Masala: Easy Recipe Guide

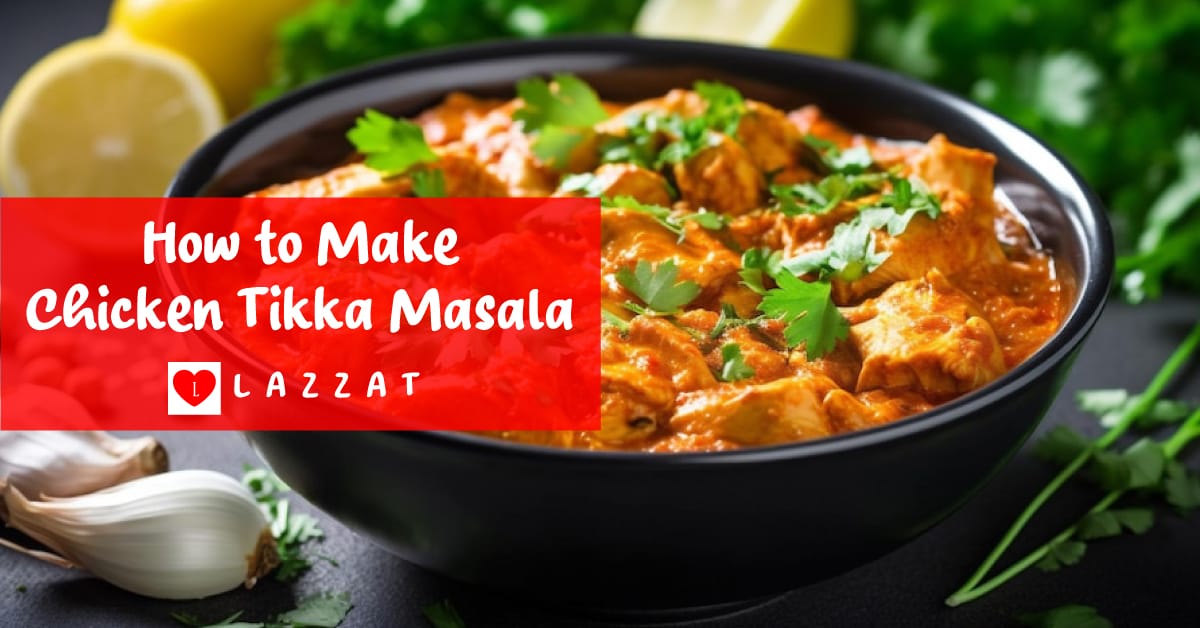
Chicken tikka masala is a favorite dish worldwide. It’s creamy and flavorful, loved by many. This guide will show you how to make it at home. It’s perfect for both experienced cooks and beginners.

This chicken tikka masala recipe will guide you through making a delicious meal. It’s sure to impress your loved ones.

We’ll share the secrets to making homemade chicken tikka masala just like the restaurants. You’ll learn about the marinade and the smooth masala sauce. Get ready to make this easy chicken tikka masala in your kitchen.

Delectable Secrets of Chicken Tikka Masala

Chicken tikka masala is a favorite dish from India that has won hearts globally. It comes from Northern India’s rich culinary traditions. Here, spices and tender chicken are key to authentic flavors.

The story of chicken tikka masala’s creation is a bit of a mystery. Some say a chef made it by adding a creamy tomato sauce to chicken tikka. Others believe it evolved as Indian immigrants in the UK adapted their recipes for local tastes.

One thing is clear: chicken tikka masala has become a symbol of Indian cuisine worldwide. It started in a small eatery and now delights food lovers everywhere.

Key Milestones in the History of Chicken Tikka Masala
Believed to have originated in the 1970s in the United Kingdom, where Indian immigrants adapted traditional chicken tikka recipes to suit local tastes.Gained widespread popularity in the UK, becoming a staple on menus of Indian restaurants and eventually being recognized as a national dish.Introduced to the United States in the 1990s, where it quickly gained a devoted following and became a beloved part of the American culinary landscape.Recognized as a global culinary sensation, with variations and interpretations emerging in different regions, showcasing the dish’s versatility and adaptability.

Chicken tikka masala’s fame shows the power of culinary fusion. It has become a dish that crosses cultural lines. Exploring its origins and evolution reveals the rich flavors that have won hearts worldwide.

Essential Ingredients for a Mouthwatering Tikka Masala

Making a delicious chicken tikka masala starts with picking the right ingredients. The spices add unique flavors, and the chicken is key to the dish’s taste. Every part is important for a dish that excites your taste buds.

Spice Up Your Life with These Aromatic Spices

The heart of chicken tikka masala is its spice blend. Key spices include:

  • Garam masala – A mix of coriander, cumin, cardamom, cloves, and black pepper, adding a strong aroma.
  • Cumin – Earthy and nutty, it brings warmth and depth.
  • Paprika – Adds a smoky flavor and a bright red color.
  • Cayenne pepper – Brings heat and complexity, balancing the dish’s richness.
  • Turmeric – Gives a yellow color and a bitter, earthy taste.

Choosing the Perfect Chicken Cuts

The right chicken cuts are crucial for chicken tikka masala. Popular choices are:

  1. Chicken thighs – Tender and juicy, they have a rich flavor and hold up well to cooking.
  2. Chicken breasts – Leaner and delicate, they need careful marinating and cooking to stay moist.
  3. Boneless, skinless chicken – This option lets the spices and sauce take center stage without bones or skin.
Chicken CutProsCons
Chicken ThighsJuicy, flavorfulHigher in fat
Chicken BreastsLean, versatileProne to drying out
Boneless, Skinless ChickenConvenient, allows spices to shineCan be less forgiving if overcooked

Choosing the right spices and chicken cuts makes a chicken tikka masala that’s both tasty and true to its roots.

Ingredients for how to make chicken tikka masala

The Art of Marinating Chicken Tikka

The secret to delicious chicken tikka is in the marinade. Proper marinating makes the chicken soak up all the spices and yogurt. This results in tender and flavorful bites. Here’s how to marinate chicken tikka perfectly for your tikka masala.

Preparing the Marinade

First, get the key ingredients for your tikka masala chicken marinade. You’ll need yogurt, lemon juice, garlic, ginger, cumin, coriander, chili powder, and salt. Mix these in a bowl to make a smooth marinade.

Marinating the Chicken

  1. Cut the chicken into bite-sized pieces for even cooking.
  2. Put the chicken in the marinade, making sure it’s well coated.
  3. Cover the bowl and refrigerate for at least 30 minutes, or up to 24 hours for more flavor.

The longer you marinate, the tastier the chicken will be. But don’t marinate for more than 24 hours. The acid in the marinade can make the chicken tough.

Achieving the Perfect Texture

For how to marinate chicken for tikka masala, texture is as crucial as flavor. Follow these steps for tender, juicy chicken tikka, ready to grill or bake.

how to make chicken tikka masala

Making the perfect chicken tikka is key to a delicious tikka masala. You can choose to grill or bake the chicken. This guide will show you how to get great results every time.

Grilling the Chicken Tikka

Grilling the chicken tikka brings out authentic Indian flavors. Here’s how to do it:

  1. Preheat your grill to medium-high heat, around 375-400°F.
  2. Thread the marinated chicken pieces onto metal or wooden skewers, leaving a bit of space between each piece.
  3. Grill the tikka for 12-15 minutes, turning occasionally, until the chicken is cooked through and has a nice char on the outside.
  4. Baste the tikka with any remaining marinade during the last few minutes of cooking to infuse even more flavor.

Baking the Chicken Tikka

Baking the chicken tikka is a simpler way to cook. Here’s what to do:

  • Preheat your oven to 400°F.
  • Arrange the marinated chicken pieces on a baking sheet, making sure they are not touching each other.
  • Bake the tikka for 18-22 minutes, flipping halfway through, until the chicken is cooked through and the edges are slightly browned.
  • For extra flavor, broil the tikka for the last 2-3 minutes to get a nice charred effect.

Whether you grill or bake, make sure the chicken is cooked well. This will give you a tasty, tandoori-style chicken tikka. With this, you’re ready to make a delicious chicken tikka masala.

Crafting the Luscious Masala Sauce

The tikka masala sauce is the heart of this dish. It’s what makes it so loved. This sauce is rich, creamy, and perfectly balanced. It brings out the best in the chicken, with its mix of spices and flavors.

Balancing the Flavors to Perfection

Making the perfect tikka masala sauce is an art. It’s about finding the right mix of ingredients. The key is to balance spices, dairy, aromatics, and tomatoes just right.

  • Spices: The right mix of spices like cumin, coriander, paprika, and garam masala gives the sauce its unique taste.
  • Dairy: Cream or yogurt adds creaminess and richness to the sauce.
  • Aromatics: Onions, garlic, and ginger add depth and complexity.
  • Tomatoes: They add acidity and sweetness, balancing the flavors.

Adjusting the amounts of these ingredients carefully makes a tikka masala sauce that’s both balanced and flavorful.

IngredientAmountPurpose
Onion1 medium, dicedProvides base flavor and aroma
Garlic3 cloves, mincedAdds depth and complexity
Ginger1 tbsp, gratedEnhances the overall flavor profile
Tomato Puree1 cupProvides acidity and sweetness
Heavy Cream1/2 cupLends creaminess and richness
Garam Masala2 tspImparts the signature spice blend
Cumin1 tspAdds earthy, warm notes
Paprika1 tspContributes color and subtle sweetness

Follow this recipe and adjust the flavors to your liking. You’ll make a tikka masala sauce that will take your homemade chicken tikka masala to the next level.

Bringing It All Together: Assembling the Tikka Masala

The final step in making a delicious chicken tikka masala is to combine all the parts you’ve carefully prepared. Putting together chicken tikka masala is easy and rewarding. It will give you a dish full of bold flavors and bright colors.

Begin by warming up the cooked chicken tikka pieces. They should be warm and slightly charred but not overcooked. Then, pour the rich masala sauce over the chicken. Make sure each piece is well-coated. The sauce should stick to the chicken, mixing spices and creaminess perfectly.

To finish, sprinkle some fresh cilantro or parsley on top of your chicken tikka masala. This adds a fresh herbal taste and makes the dish look great.

When assembling chicken tikka masala, be gentle. This lets the flavors blend together smoothly. With a bit of care, you’ll make a dish that will wow your family and friends.

Enjoy your assembled chicken tikka masala with fluffy basmati rice or warm naan bread. There are many ways to pair this dish with your favorite sides.

Serving Suggestions and Accompaniments

Chicken tikka masala is a rich and flavorful dish. It pairs well with many accompaniments. Serving it with naan bread or fluffy rice can greatly enhance your meal.

Naan, Rice, or Both? The Eternal Debate

Choosing between naan or rice for chicken tikka masala is a common debate. Both options have their own charm and can make the dish even better.

  • Naan – This soft, pillowy flatbread is a classic choice. It soaks up the sauce and adds tangy, charred notes that complement the spices.
  • Rice – Basmati rice is a neutral base that lets the tikka masala’s flavors shine. Its fluffy texture contrasts nicely with the thick sauce.

For a truly indulgent experience, serve the chicken tikka masala with both naan and rice. This way, you get to enjoy the sauce with naan and the remaining flavors with rice.

AccompanimentFlavor ProfileTexture
NaanTangy, charred notes that complement the spicesSoft, pillowy texture that soaks up the sauce
RiceNeutral base that allows the tikka masala to shineFluffy texture that provides a contrast to the thick sauce

The choice between naan, rice, or both depends on your preference. Try different pairings to find what you like best. This will make your chicken tikka masala experience even more delightful.

Serving Suggestions

Vegetarian and Vegan Twists on the Classic Recipe

Looking for a plant-based version of chicken tikka masala? There are many tasty options that keep the dish’s essence. Whether you’re a vegetarian, vegan, or just want to try something new, these versions will excite your taste buds.

One great vegetarian chicken tikka masala substitute is firm tofu or soy-based chicken. These alternatives soak up the marinade and blend well with the creamy sauce. They’re seasoned with the same spices, offering a flavorful and satisfying dish.

For vegan chicken tikka masala lovers, there are plenty of choices. Mushrooms, cauliflower, or eggplant can be used, adding a meaty texture and flavor. Trying different plant-based tikka masala recipes helps you find your favorite.

IngredientVegetarian Tikka MasalaVegan Tikka Masala
ProteinFirm tofu, soy-based chickenMushrooms, cauliflower, eggplant
MarinadeYogurt-based (dairy-free yogurt)Cashew-based (soaked cashews)
SauceCream-based (coconut milk, plant-based cream)Tomato-based (canned diced tomatoes)

No matter your diet, you can enjoy vegetarian chicken tikka masala and vegan chicken tikka masala. These recipes let you savor the dish in a way that fits your lifestyle. Discover the vibrant flavors and tender textures of these plant-based versions for a fulfilling meal.

Meal Prep and Leftovers: Making Tikka Masala Last

Learning how to meal prep and store your chicken tikka masala can make it last longer. You can enjoy its tasty flavors for days. These tips will help you keep your dish fresh and flavorful.

Storing and Reheating Tips for Maximum Flavor

To keep your chicken tikka masala tasting great, follow these easy steps:

  • Let the dish cool down before putting it in airtight containers or bags.
  • Keep it in the fridge for up to 4 days, or freeze it for up to 3 months.
  • Don’t use the microwave to reheat. It can make the sauce separate and the chicken dry. Instead, heat it gently on the stovetop over medium heat, stirring often, until it’s warm.
  • If it’s frozen, thaw it in the fridge overnight before reheating on the stovetop.
Storage MethodMaximum Shelf Life
Refrigerator4 days
Freezer3 months

By using these simple storage and reheating tips, you can enjoy your homemade chicken tikka masala for a long time. It’s easy to keep it flavorful and convenient for your meal prep.

The History and Evolution of Tikka Masala

The story of chicken tikka masala is fascinating. It starts in North India’s rich culinary traditions. The history of chicken tikka masala is debated, but its global popularity is clear.

In the 1960s, South Asian chefs in the UK created this dish. They mixed Indian chicken tikka with a creamy tomato sauce. This fusion was born out of adapting traditional dishes for British tastes.

Chicken tikka masala quickly became a hit. It won over the hearts of many, not just in the South Asian community but across Britain. Its bold flavors and comfort made it a staple in the UK.

Now, chicken tikka masala is loved worldwide. It’s found on menus everywhere, showing how it has grown. From New York to Asia, it’s a dish that brings people together through food.

YearEventImpact
1960sChicken tikka masala is believed to have been created by South Asian chefs in the UKThe dish gains popularity among the South Asian diaspora and the wider British public
1990sChicken tikka masala becomes a staple on British menus and is recognized as the “national dish”The dish’s popularity spreads beyond the UK, making it a global culinary sensation
2000s-presentChicken tikka masala is adapted and interpreted by chefs around the world, reflecting diverse culinary influencesThe dish continues to evolve, showcasing its versatility and ability to adapt to local tastes and preferences

The history of chicken tikka masala shows how food can unite us. From its UK roots to global fame, it’s a story of culinary exploration. It inspires food lovers everywhere.

Tikka Masala: A Culinary Ambassador of Indian Cuisine

Chicken tikka masala has become a favorite dish worldwide. It brings the flavors of India to people everywhere. This dish has inspired many variations, showing the variety of Indian cooking.

Exploring Regional Variations and Interpretations

Chicken tikka masala is known everywhere, but India has its own versions. The North uses tomato-based gravy, while the South prefers creamy yogurt sauces. These regional chicken tikka masala recipes show the unique tastes and cooking methods of India.

Some places use different chicken cuts or even paneer for vegetarians. The variations of tikka masala also differ in spices and ingredients. For example, some use coconut milk or fenugreek leaves.

Regional StyleKey Characteristics
North Indian Tikka MasalaTomato-based gravy, use of spices like cumin, coriander, and garam masala
South Indian Tikka MasalaCreamy, yogurt-based sauce, coconut milk additions, and mix of spices
Coastal Tikka MasalaIncorporation of seafood, such as shrimp or fish, and use of coconut milk
Vegetarian Tikka MasalaSubstitution of chicken with paneer, tofu, or a blend of vegetables

These different styles of tikka masala show Indian chefs’ creativity. They highlight the rich culinary history of India. Chicken tikka masala invites everyone to try Indian food, showing its depth and variety.

Conclusion

We hope this guide on making chicken tikka masala has inspired you. You now know how to marinate the chicken and make the masala sauce. You can make a delicious tikka masala in your kitchen.

The summary of chicken tikka masala in this guide shows you the key steps. You can pick the best ingredients and make the dish your own. This way, you’ll enjoy it and share it with your loved ones.

Starting your tikka masala journey is exciting. It’s not just about the final dish. It’s about the smells, the sounds, and the feeling of making something special. Why you should try chicken tikka masala is because it’s tasty and lets you explore new flavors in your kitchen. To read more about food recipes please visit mylazzat.com.

Video Guide: https://www.youtube.com/watch?v=Cr5dn48vER8.

FAQs

What is the difference between chicken tikka and chicken tikka masala?

Chicken tikka is grilled or baked chicken marinated in spiced yogurt. Chicken tikka masala is a curry dish with the chicken cooked in a creamy tomato sauce. The masala sauce makes the dish rich and flavorful.

Can I use boneless, skinless chicken thighs instead of breasts?

Yes, you can use chicken thighs for tikka masala. Thighs are often more flavorful and tender. Just remember, they might take a bit longer to cook through.

How spicy is chicken tikka masala?

The spiciness of chicken tikka masala depends on the recipe and spices used. It’s usually moderately spicy. You can adjust the heat by changing the amount of chili powder or cayenne pepper.

Should I grill or bake the chicken tikka?

Both grilling and baking the chicken can be delicious. Grilling adds a smoky flavor, while baking is easier. Cook the chicken until it’s tender and fully cooked.

How do I make the creamy masala sauce?

Start by sautéing onions, garlic, and spices in oil or butter. Then, add tomatoes, cream or yogurt, and seasonings like garam masala, cumin, and paprika. Simmer until the sauce thickens and flavors meld.

READ MORE